Seoraksan National Park, located in northeastern South Korea, is renowned for its majestic granite peaks, sharp ridges, and deep valleys. Daecheongbong (1,708m) boasts breathtaking views, while Oeseorak, located within the park, boasts iconic landmarks like Ulsanbawi Rock, waterfalls, and valley trails.
The autumn foliage is particularly splendid, and the snowy landscape in winter is spectacular. There are a variety of trails, from short scenic walks to daylong summit climbs and ridge traverses. It's important to start early, check weather and trail information, and be prepared for the rapid temperature changes.
If you had to choose just one mountain in Korea, I recommend Hallasan or Seoraksan. Seoraksan is not far from Seoul and is easily accessible by public transportation.
Trail Overview
Seoraksan is one of Korea's most beloved mountains and the second largest after Jirisan. However, unlike Jirisan Mountain, most of the hiking trails, except for short scenic ones, are rugged granite paths and steep slopes, with significant elevation gains and descents. Regardless of the route chosen, expect significant physical strain.
The peaks of Seoraksan, including Daecheongbong, are subject to drastic climate changes not only in winter but also in late fall and early spring. Rain and snow are possible, so check the weather forecast in advance.
The first snowfall near Daecheongbong begins in mid-October, with temperatures dropping below freezing. Bring warm clothing. Strong winds often blow near the summit in winter, and the perceived temperature can drop to below -20°C. If visiting in winter, be sure to prepare adequately for wind, cold, and snow. Careful planning is essential, as you must descend before sunset. The shorter days in winter, especially, necessitate an early morning departure for a smooth descent. Regardless of the route, most trails have limited escape routes, and popular sections like Gongryong Ridge can be crowded and schedule may be delayed.
Below are some of the most unique and representative areas of Seoraksan. Most actual trails pass through one or more of the areas listed below.
Daecheongbong (P1) is the highest peak (1,708m) on Seoraksan and the third highest peak in Korea. Offering panoramic views of the East Sea and the ridgelines of Inner Seorak, Daecheongbong divides Inner Seorak (Baekdam Valley, Suryeomdong Valley, and Gayadong Valley) from Outer Seorak (Cheonbuldong Valley and Ulsanbawi Rock). It also serves as a starting point for most of Seoraksan's valleys, including Cheonbuldong Valley.
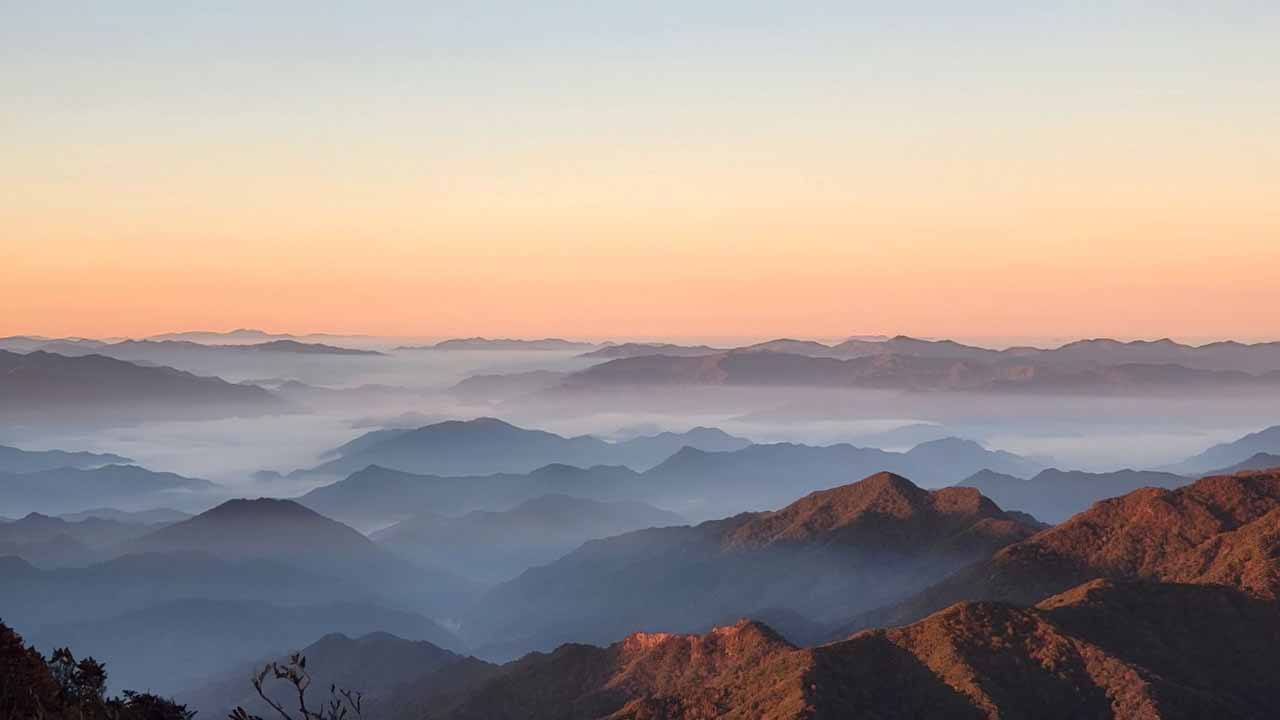
It connects to nearby Jungcheongbong (P2) and Socheongbong (P3). Temperatures fluctuate greatly, and Daecheongbong is often covered in snow from mid-October to late spring. Daecheongbong is famous for its sunrises and seas of clouds, and its autumn foliage and winter scenery are particularly impressive.
There are several trailheads to climb Daecheongbong, including Osaek, Baekdamsa, Seorakdong, and Hangyeryeong. The shortest trail is the 4.7km course from Osaek (H2). The southern (Osaek) slope is characterized by short, steep steps and long rocky sections, while the northern and western slopes boast gentler but longer ridges and valleys.
To quickly ascend Daecheongbong, many hikers choose the round-trip route from Osaek (H2) or the Hangyeryeong (H5)-Daecheongbong (P1)-Osaek (H2) route. The long-distance trails lead from Daecheongbong to Gwitaegicheongbong (P5), Bongjeongam (K4), Gongryong Ridge (K9), and Cheonbuldong Valley (S4).
In winter, strong winds can make standing difficult, so appropriate winter gear and clothing are recommended.
This 12.5km ridge, starting at Jungcheongbong (P3) and extending past Hangyeryeong Samgeori (K5) to Daeseungryeong (K6), is one of Seoraksan's signature ridges, along with Gongryong Ridge. This ridge is less exposed and has smaller up-and-down amplitudes than the Gongnyong Ridge, but it requires patience as it lasts a long time over a long distance.
Gwitdaegicheong (P5), a rocky peak at 1,578 meters above sea level, is a key point on the northwest main ridge, extending northwest from Seoraksan's main ridge. It's a premium hiking course renowned for its panoramic views and strong winds. The approximately 2km section surrounding Gwitaegicheongbong is a representative ridgeline, dotted with sharp, large rocks, offering some of the most breathtaking scenery.
The name Gwittaegicheongbong is said to have originated from the saying, "The wind blows so fiercely that your ears fall off". This course has no shelter along the way, and you can escape from Hangyeryeong Samgeori (K5) to Hangyeryeong (H5) before reaching Gwitdaegicheong. Depending on the conditions, this section can be considered more challenging than the Gongryong Ridge, so careful planning is essential.
For those seeking a shorter route, many choose the route that begins at Hangyeryeong(H5), passes through Daeseungnyeong (K6), and ends at Jangsudae (H6). However, even this route is by no means an easy day trip.
This 4.3km ridge stretches from Madeungnyeong Samgeori (K9) to Muneomigogae (K3), just before the Heeungak Shelter (S3). It is a signature rock ridge hike in Seoraksan. Its name derives from its "rugged ridge, resembling a dinosaur's back," and its unobstructed views and varied exposure are its highlights.
Madeungnyeong Samgeori is slightly higher (150m) than Huiungak Shelter, and numerous steep rock peaks form the entire ridge. With virtually no flat ground, the entire trail features challenging climbs and rocky terrain, making it an advanced course that demands both physical and mental stamina.
The majesty and mystical appearance of the rugged peaks have earned it the distinction of being the first of the 100 Scenic Views of the National Park. However, the trail is not recommended for beginners or solo hikers due to the presence of handrails, ladders, and chains, which significantly increase the risk of injury during rain, strong winds, and ice. Above all, because it's located almost in the center of Seoraksan, those approaching from Osaek(H2) or Hangyeryeong (H5) are often already exhausted by the time they reach the entrance, Huiungak Shelter (S3). If you're in this state and cross the Gongryong Ridge, you'll likely have little time to enjoy the scenery. Furthermore, after this point, you'll have to embark on another long descent, so carefully consider your options before embarking.
If you're aiming for Gongryong Ridge without having to reach Daecheongbong (P1), we recommend the Sogongwon-Madeungnyeong-Gongryong Ridge-Cheonbuldong-Sogongwon course. This course is similar in length to the Osaek route, but excluding the flat section (3km) from Biseondae to Sogongwon, it's shorter and offers about 300m less elevation gain. This makes it less strenuous overall and allows you to fully enjoy the beauty of Gongryong Ridge.
While this area boasts exceptional views on clear days, such weather isn't always easy to come by. Clouds and fog are common, and the weather can change quickly.
This is Seoraksan's signature valley, beginning at Sogongwon (H1), passing Biseondae (K2) and reaching the top of Huiungak Shelter (S3). The valley stretches approximately 5km from Biseondae to Huiungak Shelter alone. While the path alternates between gorges, rocky paths, and iron railings/wooden bridges, the overall path is well-maintained and gently slopes, becoming steeper as it ascends.
This valley is considered one of Korea's three greatest valleys, along with Chilseon Valley on Jirisan Mountain and Tamna Valley on Hallasan Mountain. The valley's rocky cliffs on both sides resemble a thousand Buddha statues, earning it the name "Cheonbuldong." It boasts breathtaking scenery, including Waseondae, Gwimyeonam, Oryeon Falls, and Cheondang Falls.
While beautiful year-round, it's especially stunning in autumn, when the vibrant autumn foliage and the bizarre rock formations create a breathtaking landscape. It's also a transit point for major hiking trails connecting Daecheongbong and the Gongryong Ridge. This is a great valley trail for families or those looking for a more casual hike, following the valley and returning at a convenient location.
This valley, stretching approximately 7km from Namgyori (H7) to the ridge before Daeseungnyeong (K6), is a representative scenic spot of Seoraksan, located in the upper reaches of Naeseorak. Its name derives from a legend that 12 fairies descended from the night sky and bathed here.
Twelve waterfalls and pools carved into the granite bedrock appear in succession. A particularly notable feature is the unique pool, whose rounded rock formations resemble a peach, earning it the nickname "Boksungatang(Peach Pool)." Designated National Scenic Site No. 98, access is strictly regulated, and visitors are advised to stay within the designated trail.
The overall slope is gentle, with few ups and downs. The lower section, approximately halfway to Peach Bath, is wide and well-maintained, while the upper section passes Daeseungnyeong Pass and continues on to Jangsudae. The entire course is quite long, to the point of being somewhat tedious. If you are going light, you can go back and forth from Namgyori (H7) to Boksungatang, and if you are going long, you can usually choose a course that goes up from Jangsudae (H6) and down to Namgyori (H7).
Daecheongbong Route
The courses introduced here are representative courses for climbing Daecheongbong.
| Course | Estimated Time (h) | Map Distance (km) | Elevation Gain|Loss (m) | Distance Ascent|Descent (km) | Gradient Ascent|Descent (%) | Difficulty |
|---|---|---|---|---|---|---|
Osaek - Daecheongbong (round trip) | - | - | - - | - - | - - | star_borderstar_borderstar_borderstar_borderstar_border |
Osaek - Hangyeryeong | - | - | - - | - - | - - | star_borderstar_borderstar_borderstar_borderstar_border |
Osaek - Sogongwon | - | - | - - | - - | - - | star_borderstar_borderstar_borderstar_borderstar_border |
Osaek - Baekdamsa | - | - | - - | - - | - - | star_borderstar_borderstar_borderstar_borderstar_border |
This is a 10km round-trip course from Namseorak Osaek (H2) to Daecheongbong (P1), making it the shortest route to Daecheongbong.
Over a distance of approximately 5km, the trail gains over 1,200m in elevation, with virtually no flat ground and a continuous slope, making it one of the steepest in Korea. There are no escape routes, so you must prepare water and other necessities in advance at Osaek.
The lower part of the trail consists of a shady forest dirt path and deck, while the upper part features rough stone steps and granite slabs. Nearing the summit, the trail follows an exposed, wind-carved ridgeline toward Daecheongbong.
While this is the most popular route for those aiming for Daecheongbong, the steep slope can be quite taxing on the knees, even for those who hike weekly.
- Restroom: H2
- Restorent: H2
- Parking: H2
This approximately 12.5km cross-country course begins at Osaek (H2) and ascends to Daecheongbong (P1), descends to Jungcheongbong (P2), turns west and follows the ridge for approximately 5km before descending to Hangyeryeong (H5) at Hangyeryeong Samgeori (K5). There are no escape routes or resupply points along the way.
The gently descent ridge features rough granite rock paths and stunning views, with a 300m drop over approximately 5km from Jungcheongbong (1,665m) to Hangyeryeong Samgeori (1,370m). From the fork in the trail to Hangyeryeong (1,000m), the final destination, Hangyeryeong, is approximately 2km away, with a 370m elevation loss. Compared to the round-trip from Osaek (H2), the total distance is about 3km longer, but the ridge trail has a gentle slope and the destination, Hangyeryeong (H5), is higher (about 1,000m), so the descent is about 400m shorter. This descent puts less strain on the knees, and offers stunning views along the ridge. If the steep climb is too strenuous, the reverse route is often recommended.
- Restroom: H2, H5
- Restorent: H2, H5
- Parking: H2, H4
This approximately 15.4km course climbs from Osaek (H2) to Daecheongbong (P1), then passes Jungcheongbong (P2) and Huiungak Shelter (S3) to Sogongwon (H1) at the lower reaches of Cheonbuldong Valley. It's a tiring course due to the significant ups and downs and the long descent of over 10km.
The Osaek-Daecheongbong section is a steep uphill climb from start to finish. From Socheongbong (P3) to Huiungak Shelter (S3), it's a steep downhill. The slope gradually becomes gentler upon entering Cheonbuldong Valley. The descent consists of numerous stairs.
On the steep descent to Huiungak Shelter, your legs will have already been weakened by the significant elevation gain during the ascent to Daecheongbong. Therefore, proceed cautiously and slowly. We recommend taking adequate rest at Huiungak Shelter before continuing.
Many people also take this course in reverse. Some, aiming for Gongnyong Ridge but feeling exhausted, change their focus at Heungak Shelter (S3) and descend to Cheonbuldong Valley as a detour.
- Restroom: H2, H1, S3, S4
- Restorent: H2, H1
- Parking: H2, H1
This is a long 17.5km course that begins at Osaek (H2), passes Daecheongbong (P1), then descends to the left fork at Socheongbong (P3), passes Bongjeongam (K4), and descends to Baekdamsa (H8). There are no escape routes along the way. Be careful not to miss the fork at Socheongbong (P3). The approximately 2km section from Socheongbong to a point just past Bongjeongam is a steep staircase. After this, a long, almost flat valley path continues for approximately 10km.
Descent from Socheongbong to Bongjeongam, you'll find the Socheong Shelter (S2) approximately 500m away. Further down, you'll reach Bongjeongam (K4). Bongjeongam is one of the highest hermitages in Korea and an important Buddhist pilgrimage site. It also offers panoramic views of Seoraksan's majestic landscape. During the fall foliage season, the foliage surrounding Bongjeongam, combined with the surrounding Yongajangseong Fortress, creates a breathtaking scene. If you visit this area, I highly recommend visiting the nearby stupa. Many hikers choose this route to visit Bongjeongam (K4).
Past Bongjeongam, descending a steep slope, you'll reach a valley path that's almost tediously long. Clear your mind and keep walking until you reach the end. The Suryeomdong Shelter (S1) is located about halfway along the valley path. The entire valley path is well-maintained and feels almost flat, making it easy to navigate. However, the long distance can make you feel tired over time.
You can refill your water at two shelters along the way and at Bongjeomam. If you arrive at Bongjeongam around lunchtime, you can enjoy a free light meal (temple food) at the temple. It is about 7km from Baekdamsa (H8) to Yongdaeri (H9), where the exit is, and the road is not suitable for walking, so take the shuttle bus from Baekdamsa (KRW 2,500 one way, as of July 2025).
- Restroom: H2, H8, H9, S1, S2, K4
- Restorent: H2, H8
- Parking: H2, H8, H9
Ridge∙Long distance Route
The courses introduced here are the dream destinations of mountaineering enthusiasts in Korea. We recommend attempting them only if you have experience with similar difficulty levels and are confident in your physical fitness.
| Course | Estimated Time (h) | Map Distance (km) | Elevation Gain|Loss (m) | Distance Ascent|Descent (km) | Gradient Ascent|Descent (%) | Difficulty |
|---|---|---|---|---|---|---|
Sogongwon - Gongryong (loop) | - | - | - - | - - | - - | star_borderstar_borderstar_borderstar_borderstar_border |
Osaek - Gongryong - Sogongwon | - | - | - - | - - | - - | star_borderstar_borderstar_borderstar_borderstar_border |
Osaek - Gongryong - Baekdamsa | - | - | - - | - - | - - | star_borderstar_borderstar_borderstar_borderstar_border |
Hangyeryeong - Namgyori | - | - | - - | - - | - - | star_borderstar_borderstar_borderstar_borderstar_border |
Osaek - Namgyori | - | - | - - | - - | - - | star_borderstar_borderstar_borderstar_borderstar_border |
This 19km course begins at Sogongwon (H1) and circles Biseondae (K2), Madeungnyeong Samgeori (K9), Gongryong Ridge, Muneomigogae (K3, Muneomi Pass), Cheonbuldong Valley, and Biseondae (K2), returning to Sogongwon (H1). It's a relatively easy course, passing through Gongryong Ridge, the central ridge of Seoraksan.
From Sogongwon to Biseondae, the distance is approximately 3km, mostly flat. From there, a steep staircase to the right leads to the ridge. Following this ridge for another 3km, you arrive at Madeungnyeong Samgeori (K9), the entrance to Gongryong Ridge. From here, you'll pass through Gongryong Ridge, the highlight of this course, and enjoy the stunning views. After about 5km of ups and downs, you'll reach Muneomigogae (K3) and immediately enter the entrance to Cheonbuldong Valley. From here, you'll descend along the valley for about 5km, rejoining Biseondae and returning to Sogongwon. From Muneomigogae (K3), before entering the Cheonbuldong Valley entrance, head to the right for about 300m to find Heungak Shelter (S3), where you can use the cooking area, restrooms, and refill your water supply.
Compared to the course from Osaek (H2) to Daecheongbong (P1), the ascent is about 300m lower and the descent is about 500m lower. The 3km section from Biseondae to Sogongwon is mostly flat, but excluding this, the distance is shorter. A variation of this course is also possible: ascending to Cheonbuldong Valley, passing through Gongryong Ridge, and then descending from Madengnyeong Intersection (K9) to Baekdamsa (H8). The distances are not significantly different. If you enjoy valleys, this route is also a good option.
- Restroom: H1, S3
- Restorent: H1
- Parking: H1
This long, 18km course features significant ups and downs, starting from Osaek (H2) and continuing along Daecheongbong (P1), Huiungak Shelter (S3), and the 5km Gongryong Ridge, the highlight of this course and central ridge of Seoraksan. It passes through Madeungryeong Samgeori (K9), Biseondae (K2), and finally arrives at Sogongwon.
After a steep 5km ascent from Osaek to Daecheongbong, and a steep descent from Socheongbong (P3) to Huiungak Shelter (S3), you'll be quite exhausted, so take a break here. After crossing the winding Gongryong Ridge, you'll reach Madeungryeong Samgeori (K9). Here, you'll branch off to Sogongwon or Baekdamsa.
From Madeungryeong Samgeori (K9), follow Madeungryeong Ridge to the right for about 3km, then descend the steep stone steps. Descending this path, you'll reach Biseondae (K2). The remaining 3km to the destination, Sogongwon (H2), is mostly flat. The Madeungnyeong Ridge from Madeungnyeong to Biseondae is a relatively gentle downhill slope.
Water refills are not available after the Huiungak Shelter. Water supplies often run low in the latter half of the Madeungnyeong Ridge, so be sure to refill at the Huiungak Shelter before entering the Gongryong Ridge.
This is one of the most popular routes to the Gongryong Ridge.
- Restroom: H2, S3, H1
- Restorent: H2, H1
- Parking: H2, H1
From Osaek (H2) to Madeungnyeong Samgeori(Intersection) (K9), the trail follows the same route as Osaek - Gongryong - Sogongwon (H2 → H1). From Madeungnyeong Samgeori (K9), the trail descends to Baekdamsa (H8). It is a long, steep 20km route with significant ups and downs.
From Madengnyeong Samgeori, the path is divided into Baekdamsa or Sogongwon. In the case of Sogongwon, the steep stone steps down to Biseondae are challenging, and in the summer, there is no valley water accessible, and there are restrictions on restrooms and drinking water supplies. So the Baekdamsa direction is preferred for a more peaceful ending.
This course is one of the most popular routes along the Gongryong Ridge. From Madeungnyeong Samgeori(Intersection) (K9) to Baekdamsa (H8), you'll pass two hermitages: Oseam (K8) and Yeongsiam (K7), where restrooms and water refills are available. It is about 7km from Baekdamsa (H8) to Yongdae-ri (H9), where the exit is located, and the road is not suitable for walking, so take the shuttle bus from Baekdamsa (2,500 won one way, as of July 2025).
- Restroom: H2, S3, K8, K7, H8
- Restorent: H2, H9
- Parking: H2, H9
This approximately 18km course begins at Hangyeryeong (H5), passes through Gwitdaegicheongbong (P5), reaches Daeseungnyeong (K6), and descends to Namgyori (H7). It offers a unique experience of Seoraksan's Northwest Ridge, a signature ridge along with the Gongryong Ridge.
Weather permitting, the Northwest Ridge offers unique and stunning views and charms distinct from the Gongryong Ridge. The views around Gwitdaegicheongbong (P5), the center of the Northwest Ridge, are particularly spectacular.
While the trail has fewer ascents and descents than the Gongryong Ridge, it's a demanding route, with a 2km steep slope around Gwitdaegicheongbong (P5) and no water refill points.
This trail is a must-visit for hiking enthusiasts. Descending from Daeseungnyeong (K6) to Jangsu-dae (H6) shortens the distance by about 6km, making it a great day hike.
- Restroom: H5, H7
- Restorent: H5, H7
- Parking: H5, H7
This 26km long-distance trail begins at Osaek (H2), ascends Daecheongbong (P1), and follows the entire northwestern ridge from Jungcheongbong (P2) to Daeseungnyeong (K6), before descending through Sibiseonnyeotang Valley to Namgyori (H7).
It offers the unique, expansive ridge views and charm of the northwestern ridge, combined with a quiet, long descent. The significant elevation changes and long distances are physically demanding.
After departing from Osaek, there are no resupply points for the entire trail, so prepare plenty of water and other supplies in advance. There are no restrooms.
Of the courses featured here, this one may be the most challenging. We recommend you reconsider your decision before embarking on this trail.
- Restroom: H2, H7
- Restorent: H2, H7
- Parking: H2, H7
Valley∙View Short Distance
The courses introduced here are relatively short, scenic, and beginner-friendly, making them suitable for families.
| Course | Estimated Time (h) | Map Distance (km) | Elevation Gain|Loss (m) | Distance Ascent|Descent (km) | Gradient Ascent|Descent (%) | Difficulty |
|---|---|---|---|---|---|---|
Heullimgol - Jujeongol - Osaek | - | - | - - | - - | - - | star_borderstar_borderstar_borderstar_borderstar_border |
Towangseong Falls | - | - | - - | - - | - - | star_borderstar_borderstar_borderstar_borderstar_border |
Ulsanbawi (round trip) | - | - | - - | - - | - - | star_borderstar_borderstar_borderstar_borderstar_border |
Cheonbuldong Vally (round trip)) | - | - | - - | - - | - - | star_borderstar_borderstar_borderstar_borderstar_border |
The 5.5km trail from Heullimgol (H4) to Osaek Mineral Spring (H3) features a 370m ascent and some steep slopes, requiring hiking boots. However, if you proceed slowly, the trail is not too difficult.
Starting from Heullimgol (H4), the first 1km of the trail leads to the entrance to Deungseondae (P6). Climb the stairs to the ridge, and the autumn foliage and winter snowscapes from here are breathtaking.
The trail descends entirely, offering a shaded and cool canyon walk. It follows decks, bridges, and rock steps, passing boulders, pools, and small waterfalls. Flat sections alternate with short, steep sections.
The autumn foliage season attracts a huge crowd. Winter brings strong winds, but the quiet atmosphere and breathtaking snowy scenery are worth enjoying.
Reservations for this trail are required online. Online reservations are only available on the Korean version, not the English version. For reservations, please refer to the official website at the top of this page.
- Restroom: H4, H3
- Restorent: H4, H3
- Parking: H4, H3
This family-friendly valley course is a 5.2km round-trip, starting at Sogongwon (H1), continuing along the flat terrain to Biryong Falls, and ascending approximately 200m to Towangseong Falls (K1).
Towangseong Falls is one of Seoraksan's most iconic waterfalls, with a three-tiered waterfall totaling 320m. It was designated National Cultural Heritage Site No. 96 on March 11, 2013.
The course extends to an observatory located more than 1km from the falls, offering a distant view. Access to the falls is limited. It's said that when the water level is low, it can be difficult to locate the falls. However, the view from the observatory is exceptional, offering panoramic views from Towangseong Falls to Sokcho City and the ocean. In winter, it's also a popular spot for ice climbing.
- Restroom: H1
- Restorent: H1
- Parking: H1
This popular course, a 7.4km round trip from Sogongwon (H1) to Ulsanbawi (P7), is located off the main ridge of Seoraksan.
Ulsanbawi is a massive granite mass, towering like a folding screen. Its six peaks, formed by the unique weathering of the granite, create a dramatic cliff face, a wondrous natural landscape that resonates with many.
Upon reaching Ulsanbawi, you'll ascend the seemingly endless staircase to reach the panoramic observatory. While the upper area is windy and exposed, there are railings.
It can be very crowded during the peak autumn season.
- Restroom: H1
- Restorent: H1
- Parking: H1
This 13km round-trip course connects Sogongwon (H1) to Biseondae (K2) and Yangpok Shelter (S4). Choose a course that best suits your fitness level and needs, turning back at any suitable stop along the way.
The route from Sogongwon (H1) to Biseondae (K2) is a wide, flat path, and from there, it's a classic valley walk to the upper observation deck. Choose from a variety of options, from the family-friendly lower section to the more challenging upper section.
The lower section is extremely crowded during the autumn peak season.
- Restroom: H1, S4
- Restorent: H1
- Parking: H1